By now we’re all well aware of just how expensive energy is, and like all the other key attributes and data points in and around my house, I want my energy consumption and costs in HomeAssistant too, exactly as reported by my SMETS2 meters.
In the UK however, our smart meters aren’t quite as open as those you could find on the continent, so if we want to go about this in the easiest way possible, then we’ve got to use a third-party app.
Expectations
Before we dive in, let us be realistic and outline what I expect you’ll be able to achieve by getting your data into HomeAssistant using this method.
Good bits:
- You’re going to get 5 sensors per meter which will contain everything you need to accurately track your usage and costs within HomeAssistant accurately and make fancy dashboards out of
- Something that can be tricky when using methods to track energy usage like using CT clamps and the like is accounting for the standing charge, as well as accounting for fluctuations in rates, especially as most of us are on the standard variable rate at this point in time, this method makes all that a breeze and removes the need to go through the arduous task of fixing bad data after it’s been recorded in the SQLite DB
- You don’t need to deploy any additional hardware whatsoever if you’re happy with the drawbacks of using this method
Bad bits:
- The usage data is rarely available near real-time
- It’s a third-party service, which HomeAssistant is polling, which means if the service is down for whatever reason, there’s further delay in getting the data into HomeAssistant
- Because of the aforementioned data latency, don’t expect to be able to use this integration with a fancy dashboard setup to go around your house hunting high-energy consumption devices, your in-home-display (IHD) is probably best suited to that if you have one
With that said, even if you’re about to head down the CT clamp route this integration is still extremely useful just for the costings side of things alone. I personally have an ESPhome-based CT clamp sensor to give me real-time kW/h usage readings and use the data from Bright to report just the daily total costs, all this can then be presented in a single view within the energy dashboard within HomeAssistant.
Here’s how to go about setting it up.
A Quick Note
Glow is a trading name of Hildebrand Technology Limited and is the creator of the Bright app, all rather unnecessarily confusing.
Setup
First, download and sign up for the Bright app on Google Play or the iOS App Store
Once you’ve signed up for the app, it can take a good few hours until your data is available to view so whilst you are waiting for the data to become available you can go ahead and install the Hildebrand (DCC) integration via HACS.
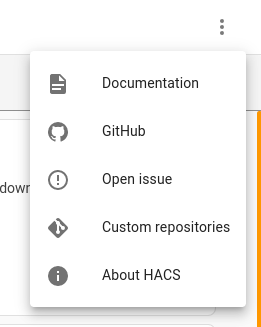
Have a read of this if you don’t have HACS installed.
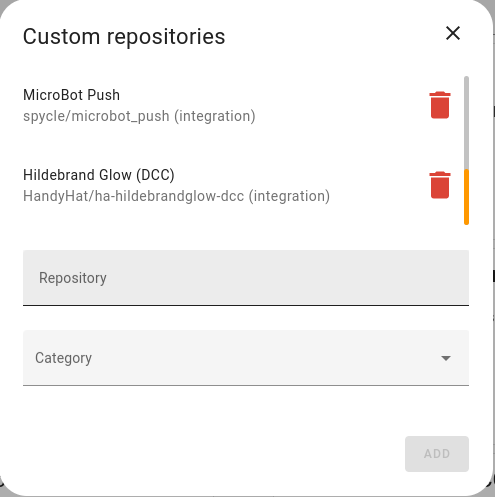
Now assuming you have HACS installed, head here to get the repository URL and add it as a custom repository:
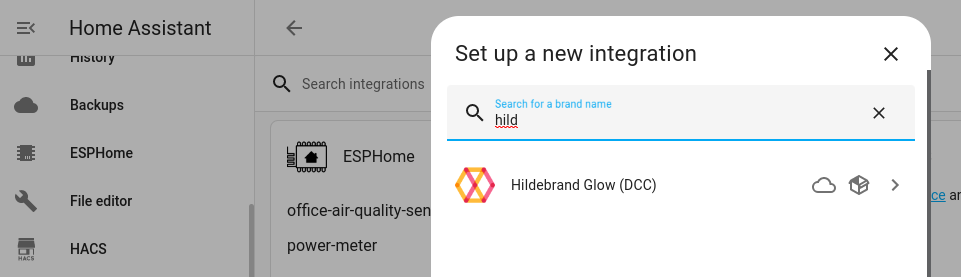
Now that we have the repository installed, we should head to “Settings” -> “Devices & Integrations” and install the Hildebrand Glow (DCC) integration:
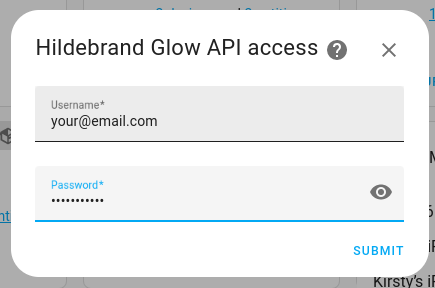
Simply enter the credentials you used to sign up for the Bright app earlier with:
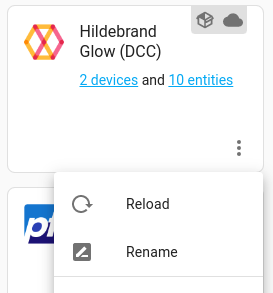
Then you will have an interaction listing your smart meters as devices, as well as 5 entities each:

If your data is still not available in the Bright app, then you won’t see any devices or entities here yet either, once it does appear in your app you might need to “Reload” the integration to it pick up the new deices and entities:
Visualising the Data
Now to setup HomeAssistant’s Energy Dashboard, simply head to Settings > Dashboards > Energy, then setup each service like so:
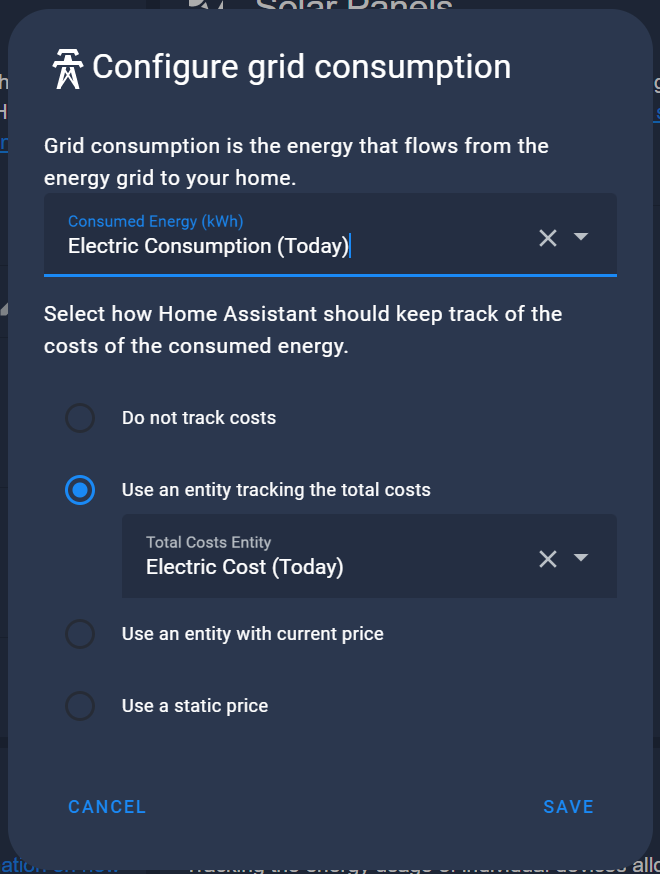
The reason we use a separate entity to track the overall cost is that the “Electric Cost (Today)” entity also factors in your standing charge, so it’s a true and accurate representation of your total daily cost which you wouldn’t get if you were calculating per kWh.
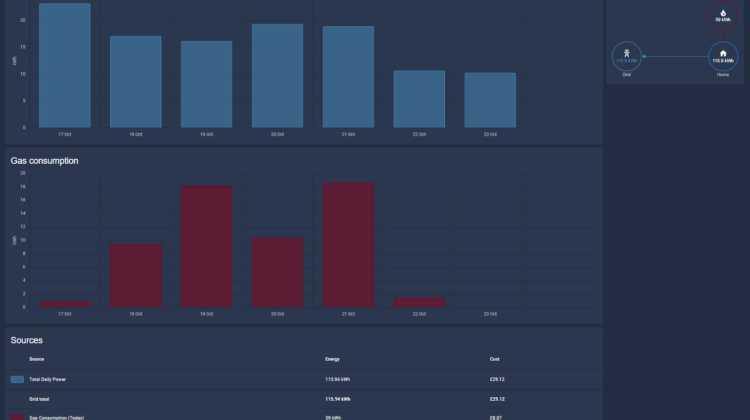
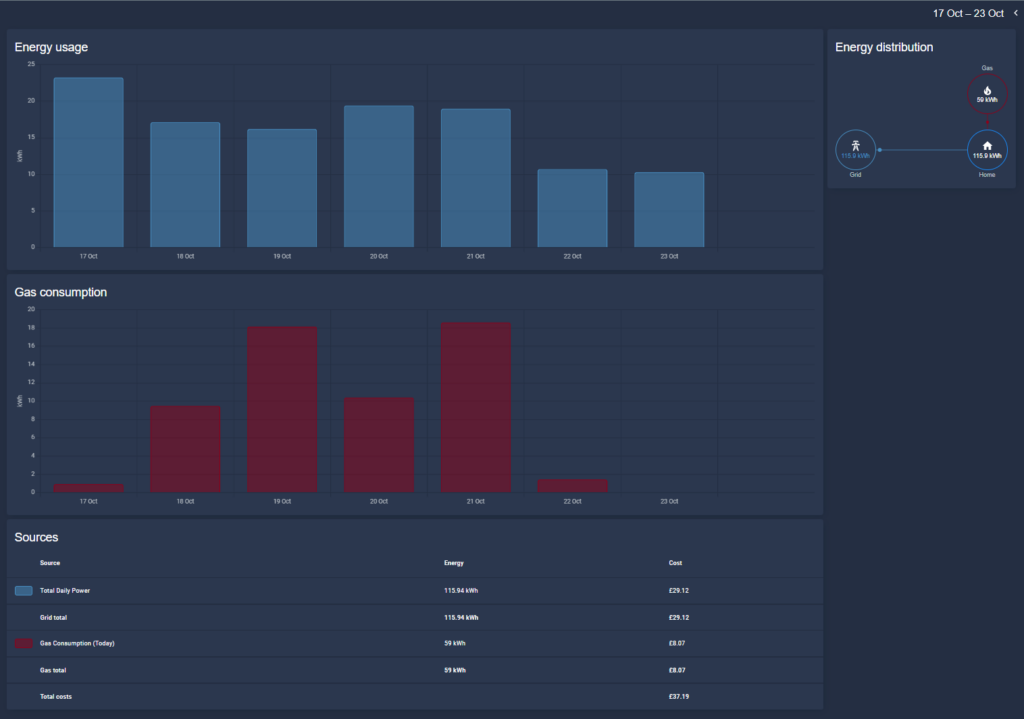
Once you have done the same for your gas, after waiting a little while for HomeAssistant to process the entities statistics, you should have something that looks like this when you visit the energy dashboard:
Hope that helps, comment below if you have any questions, I’d be happy to help!
Leave a Reply