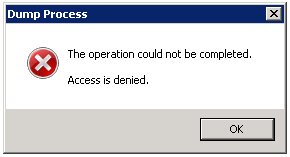
If you are having trouble creating a dump file from a process owned by the system user, then read on and I will show you how to resolve this.
Before we start, you will need the following tools and information:
- PsExec to execute commands as other users
- ProcDump to create the dump file
- The PID of the process you wish to create a dump file from (use this tutorial if you are unsure)
Now, within a command prompt, use psexec to execute cmd as the system user:
C:\Users\USER\Desktop\PSTools>psexec -i -s -d cmd
The output of this command should look something like this:
PsExec v2.11 - Execute processes remotely
Copyright (C) 2001-2014 Mark Russinovich
Sysinternals - www.sysinternals.com

cmd started on HOSTNAME with process ID 2716.
Along with the above output, a new command prompt window will have now opened.
You will know if you have successfully executed cmd as the system user as your prompt will look like this:
C:\Windows\System32>
Now it’s time to use procdump to create your dump file, so switch to the directory where procdump has been downloaded to:
cd ..\..\Users\USER\Desktop
Then, using the PID we obtained earlier, we tell prodcump which process to create a dump file from:
C:\Users\USER\Desktop\PSTools>procdump -ma 7832

ProcDump v7.1 - Writes process dump files
Copyright (C) 2009-2014 Mark Russinovich
Sysinternals - www.sysinternals.com
With contributions from Andrew Richards

[11:56:32] Dump 1 initiated: C:\Users\USER\Desktop\Powershell.exe_150714_115632.dmp
[11:56:36] Dump 1 writing: Estimated dump file size is 271 MB.
[11:56:37] Dump 1 complete: 271 MB written in 5.6 seconds
[11:56:38] Dump count reached.
Congratulations, you now have a dump file ready for debugging!
Leave a Reply